How to Grow Mushrooms at Home: A Beginner’s Guide
Do you think you need to be a scientist with a lab to grow mushrooms at home? Armed with a few tips, anyone can do it. In this guide, mushroom farmer Amy Horrigan walks you through all the essentials so that even a total beginner can grow awesome mushrooms!


Contents
This guide is for the absolute beginner, so I’ll focus on methods that can be done with little to no equipment and those that aren’t too time-consuming. One of the scariest things for me when I started growing mushrooms was the thought that I might accidentally grow something toxic. I mean, you are creating the perfect environment for mold. But don’t worry; with this guide, you’ll grow fresh, clean mushrooms in no time.
You’ll be safe with the knowledge that you know what to look for and when to toss it if the experiment goes sideways (don’t worry, if you follow this guide, it won’t). You’ll know when you’ve passed those critical early stages and can start looking up recipes and thinking about what to do with your harvest.
It’s All About The Strain!

Strain selection is an extremely important factor in success as a beginner. There are tons of varieties of mushrooms out there—about 14,000 species that we know of! With all that diversity, it isn’t too difficult to find some tasty beginner-friendly strains. But even with beginner-friendly strains, not every mushroom is appropriate for every method in this guide, so make sure you look at the recommended list for each method.
Myco Basics

You probably have a pretty good grasp of the life cycle of a plant. The life cycle of a mushroom is very similar on a basic level, but it’s important to know the vocabulary and some of the differences in how mushrooms grow. This will ensure that you create the perfect little ecosystem for your mushrooms so they are happy and growing with ease.

As a beginner, you’ll interact with the life cycle in the mycelium and fruitbody stages. You can think of the mycelium as similar to seeds in garden plants, and you’ll use it in much the same way to seed your substrate.
The main difference is that, while a vegetable plant will grow, fruit, and die in a season, the mushroom will fruit, rest for a week or two, and fruit again. Each time it fruits is called a flush. Some mushrooms will produce three or four flushes, and some may only get one flush. The next stage is primordia; if you’re not paying close attention, it may pass through this stage before you even see it. This is because the primordia are very small until fruitbody selection happens.
Primordia are similar to seedlings. They are little baby mushrooms, and just as you might plant three or four seeds in a space and cull the weaker plants, the mushroom will do something similar in a stage called fruitbody selection. In this stage, some of the primordia will grow into mushroom fruits, some will stay dormant until the next flush of mushrooms, and some will atrophy.
Method 1: Purchase a Ready-Made Grow Kit
A ready-made grow kit is the absolute easiest way to begin. These kits come with detailed instructions and include everything you’ll need. The other great thing about them is that they come fully colonized with an easy strain, and they’re ready to fruit immediately.
Important Tips:
- Kits come fully colonized, and while there is a small window to initiate fruiting, it’s not very long. You usually only have about a week before you need to use your kit. So be mindful of the timeframe, and don’t order until you are ready to start. If the kit sits in the back of a closet or a shelf, the mushrooms might start fruiting inside the bag.
- Your kit will come with instructions specific to the mushroom strain, so keep your eyes open and read the directions. Every mushroom has its own needs. You probably won’t be able to create ideal conditions with the kit, but usually, the genetics are selected because they are vigorous in less-than-ideal conditions.
- Of the available kits, Lion’s Mane, Hericium erinaceus, and Oyster, Pleurotus ostreatus, mushrooms will be the easiest. King Trumpet, Pleurotus eryngii, aka King Oyster, is a little more finicky, but so delicious and not difficult if you follow the instructions.
- No matter the strain, you will be spraying your kit with water, and it can create a mess. You can place your kit on a plate or in a planter tray to keep water from pooling on your counter.
You may be wondering what to do with the mushroom block after you harvest it. Most mushroom kits are created using hardwood sawdust, which means it is a good source of carbon for your garden. You can throw it into your compost, use it to seed a straw bale, sprinkle it onto your garden beds, or use it to mulch fruit trees.
Method 2: Create a Log-stack for Repeat Seasonal Harvests

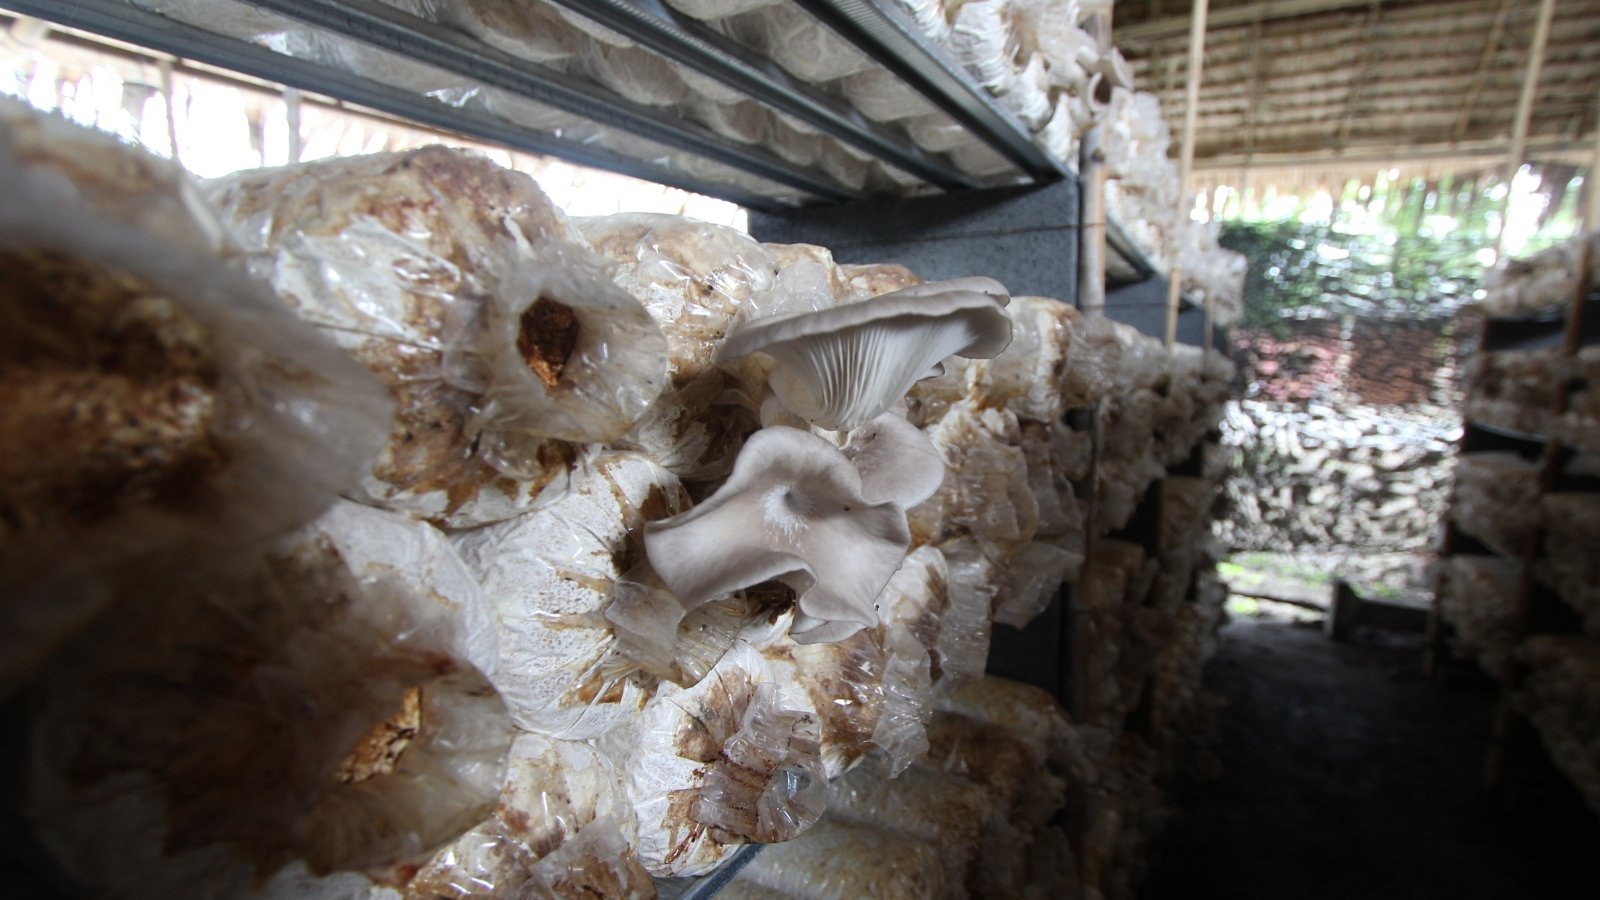
Log-stacks are some of my absolute favorite things to make because of how long they fruit (eight to ten years), how much they produce, and how easy they are to make. They are perfect for shiitake and blue oysters because those strains prefer colder weather and enjoy being outside through the winter.
This is also a great use of any disease-free branches or trees that come down during winter storms. You need access to large rounds of hardwoods, i.e., oak, maple, ash, poplar, etc.
Timing is very important. Make sure you are using rounds that are fresh. You want to inoculate within about eight weeks of the tree being cut. As with all log inoculations, you should cut the tree when it is dormant and the sugar sap is not running, i.e., starting in the fall when one third of the leaves have changed color up until bud set in the spring.
What You’ll Need
- Three log rounds for each stack, one piece that is two inches long and two 8-14 inch long sections. Make sure the diameter is 8-14 inches.
- A fully colonized sawdust block of whatever strain you want. Shiitake and blue oyster work well with this method. One sawdust block will make two to three stacks.
- A large black garbage bag, like a large leaf yard waste bag.
- Some small pieces of cardboard that are a little bit bigger than your rounds. Make sure this is plain brown with no colored inks. You’ll need one piece for each stack you’re making.
Setting Up Your Log-stack
In your garage or another warmish space, find an out-of-the-way spot where you can build the stack. Keep in mind that it will sit there for four to six months, undisturbed. Then, follow these steps:
- Take the garbage bag, open it up, and get the bottom flat on the floor.
- Place the piece of cardboard inside the garbage bag in the middle of the bottom.
- Sprinkle a layer of spawn on top of the cardboard and set your largest round on top of the spawn.
- Then, sprinkle a layer of spawn on top of the round and set your second round on top of the first, stacking them up.
- Add your final layer of spawn on top of the second log round, and place your two-inch round on top, capping off your stack.
- Finally, pull up the garbage bag so everything is fully enclosed, and tie off the top. This will create a nice, warm place for your spawn to colonize the logs.
I like to make these in the spring and then move them in place in the fall. They kind of glue together, so they’re not so hard to move. But you still have to be gentle when moving them, or they’ll break apart. Find a permanent place for them in your yard that is shady, with dappled sunlight, like underneath a tree. They should fruit in the fall, and then you should see fruits every spring and fall for the next five to ten years, depending on the size of the rounds.
Method 3: Inoculate a Bucket for an Abundance of Mushrooms

Growing oyster mushrooms in a bucket is very easy. Basically, you are soaking straw in water that has been treated with hydrated lime. This method doesn’t require any expensive equipment and will give you tons of mushrooms, so be prepared to dry them or give them away; you will have more mushrooms than you can eat! This is a very beginner-friendly method.
What You’ll Need
- A five-gallon bucket with a lid.
- A drill with a ½ inch bit.
- Chopped straw – don’t get hay. Make sure it is straw. This straw is the perfect size for two buckets and is already chopped.
- A large container to soak your straw, like a tote or trash bin.
- Pillowcase, burlap sack, onion bag, i.e., something to put the chopped straw in – keep in mind, it will be fully submerged.
- A weight to hold down the straw and make sure it stays fully submerged.
- Mushroom spawn (either grain spawn or sawdust spawn).
- Hydrated lime (make sure it is low in magnesium) & a scale to measure it out.
- Rubber gloves.
- pH meter
Setting Up Your Bucket
First, ensure your bucket is clean, food-grade, and has no cracks.
- Using the ½ inch drill, drill holes in a diamond pattern around the full circumference of your bucket. Your mushrooms will grow out of these holes.
- Chop your straw into two to three-inch pieces. The shorter straw pieces will make it easier for the mycelium to jump from piece to piece. This enables faster colonization, greater nutrient access, and potentially larger yields.
- Put on gloves and a mask. Add the hydrated lime to the water in a large drum or other container. It usually takes about six grams per gallon of water. You want the lime and water mixture to reach 12.5 pH. This will kill off all of the mold spores, bacteria, and other competitive organisms in the straw, leaving a clean slate for your mushroom mycelium to run through.
- Load your straw in your pillowcase, tie up the top, and submerge it fully under the water. I use a round grill grate with a cinderblock on top to keep it submerged, but you can use any weight you have lying around.
- Soak your straw for 16-24 hours. When the time is up, pull the straw out and let it drain on a screen or table for about 30 minutes or so.
Safety Note: You’ll be using the hydrated lime to increase the pH of the water dramatically. Hydrated lime is potentially dangerous. If you get it on your skin, it can cause rashes and burns, and it is damaging if you get it in your eyes or breathe it into your lungs. I like to wear long kitchen dish gloves that go up to my elbows, eye protection, and a mask. Safety first!
Colonization
Now, the fun part starts! Get your bucket and grain spawn. Put a two-inch layer of straw in the bottom of the bucket. Sprinkle a handful of spawn on the straw and continue layering until you’re at the top of the bucket. Put the lid on the bucket and store at room temperature and away from direct sunlight. The mycelium will colonize your bucket quickly. In about 10 – 14 days, it should be fully colonized and ready to fruit.
Monitor
Keep an eye on it throughout. Some oyster mushrooms colonize very quickly, and you might see baby fruits pushing through the holes in your bucket earlier than expected. About halfway through, open the lid and give your bucket a check. First, the smell test: if it smells funky, it’s time to toss it. And if you don’t see any mycelium growing, or no white under the top layer of straw, also – unfortunate news….but you can always try again!
To fruit your bucket, you’ll want to move it to an area where there is a lot of fresh air but is also protected from direct sun and wind, like a shady spot underneath trees or shrubs or on a corner of your deck or porch. You can spritz the bucket holes with water a couple of times a day to ensure there is plenty of humidity. Harvest oyster mushrooms for peak flavor and nutrients when the edge of their caps is still slightly curled under. If you let it go too long and the cap flattens out, you will have a big mess of white spores everywhere.
Method 4: Seed a Straw Bale

Seeding a straw bale is a great way to have a boom crop of mushrooms, and it is so easy! This method only works with oyster mushrooms. This is because we aren’t pasteurizing or sterilizing the straw, so it has to be a really aggressive mushroom. It also has to be done outdoors because you need the natural balance to assist in holding pathogenic competitors to a level that allows the mushrooms to get a toehold.
You can find a weed-free and perfectly chopped straw bale in the Epic store. I like to do this in early fall, after the first rain. Once I’ve harvested the mushrooms and my garden beds are ready for winter dormancy, I use the spent straw to mulch them. Make sure you use a straw bale, not a hay bale. Not only is the price of a straw bale much less than hay, it’s better for the mushrooms.
Setting Up Your Straw Bale
Set your straw bale in a shady spot that you can reach with your garden hose. Give your bale a good soak, and I mean a real good soak, like a couple of hours. Or, if you like doing things the easy way, just set it out in the morning right before a rainy day and let nature do the work.
- Take a gardening trowel or a stick, wedge it into the straw bale, and wiggle it around until you’ve got a bunch of little space pockets.
- Take your spawn; this can be grain spawn – or even your spent mushroom block, leftover from a kit, and sprinkle some generously in these pockets. Use one 5lb bag of spawn per straw bale.
- Keep your bale moist, lightly watering it at the same pace you water your vegetable garden. Over the next few weeks, you will notice the mycelium colonizing the straw. You can expect to harvest in three to four weeks.
After you have harvested your mushrooms, you can add your bale to your compost pile or use it as winter mulch for your garden beds.
Final Thoughts
Growing mushrooms is easy as long as you remember to start with an easy method and a beginner strain, like lion’s mane or oysters. Read the directions fully before starting, be mindful of the sun, and ensure you have the right tools. Then, start imagining lion’s mane crabcakes or pulled oyster tacos, sigh. It really is all about the food!
This is an awesome way to increase diversity and incorporate closed-loop farming practices into your methods. It’s a very tasty way to recycle nutrients and add organic matter back to the soil, increasing the diversity of life. Happy garden, happy life.