11 Tips for Starting a Straw Bale Garden
In gardening, there are many options for growing plants, including in-ground, containers, raised beds, and hydroponic systems. Why choose to plant in a straw bale garden? Gardening expert Kelli Klein shares the benefits of straw bale gardens and how to build your own!


Contents
Why start a straw bale garden? Well, they have many benefits. Some prefer them because there’s less weed pressure. Others, because they are low-cost and easy to put together. They’re also conveniently portable. If you rent and are working with a temporary garden rather than something more permanent, they are easy to move. They also maximize space in small gardens. Last, the straw decomposes and breaks down over time, creating warmth that can extend your growing season.
A little bit of setup is required when getting your bales ready for planting, referred to as “conditioning.” Eventually, the straw will break down and will need to be replaced. At most, you can get two seasons’ worth of use. But overall, it can be a quick and low-cost way to set up a garden without much upfront investment or long-term commitment to the layout.
Verify That The Straw is Herbicide Free

Do not skip this step! If your bales contain herbicides, your garden may flounder or even fail. It’s also important to find bales specifically from straw rather than hay or alfalfa bales. Straw is essentially the unused portion of commercially grown grains like wheat.
You can verify that the straw is herbicide-free by communicating directly with the source of the straw. If this option is unavailable, however, there are ways to test it at home. Plant bean plants. Since beans are very sensitive to herbicides, you will quickly be able to tell if any are present in your straw. Beans will exhibit deformed or yellow foliage in the presence of herbicides.
Turn the Bale Onto the Narrow Side

Straw bales will come tied in twine to keep the bale together. You’ll want to place the bale with the narrow side facing up, ensuring the twine is on the sides and will help hold the bale together.
This will also ensure that the straw is running perpendicular to the ground. Since the straw is hollow, this will help water run through the straw as well. It gives less planting space, but the benefits outweigh the loss of space.
Choosing a Location

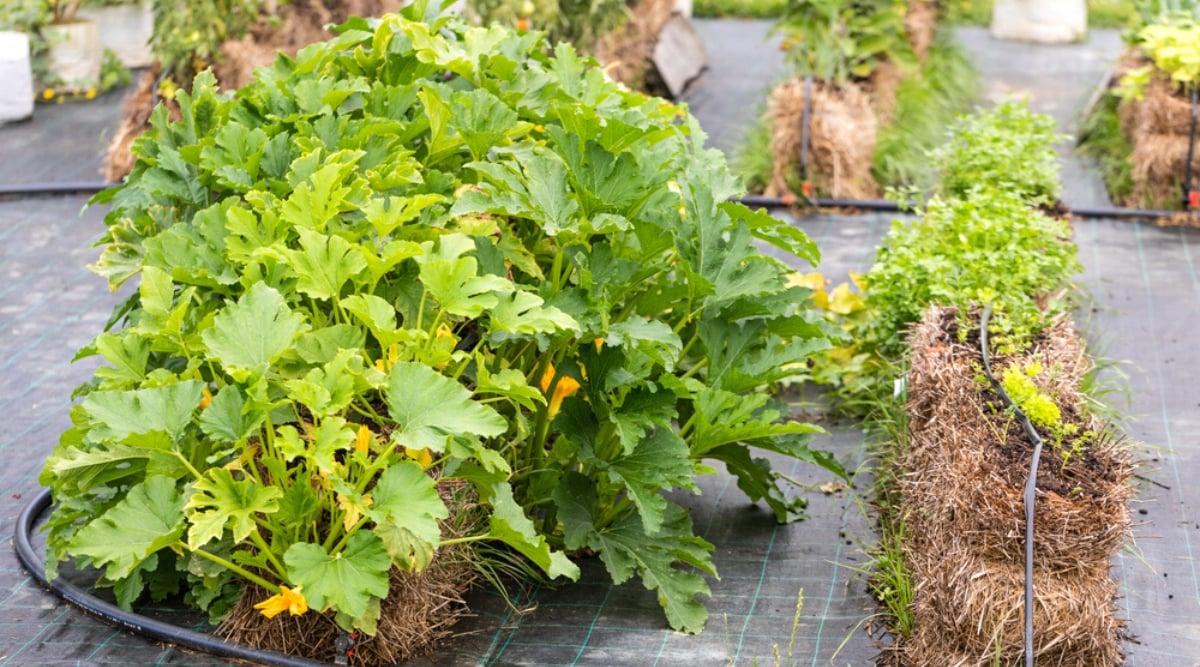
Straw bales can be placed anywhere. On a driveway, gravel, patio, or any surface will do! Since this bale is operating without soil, the options are limitless! Six bales will equate to the planting space of a four-foot by eight-foot raised bed but will give you even more options when it comes to configuration.
You can place them in a long row, an L shape, or a keyhole. As with any potential garden site, you’ll want to be mindful of how much overall sun the area receives. Most plants need full sun, which equates to 6-8 hours daily.
When planting into your bales, consider the mature height of your plants. Don’t place larger plants in front of shorter ones and risk shading them out. If you live in the Northern Hemisphere, a good rule of thumb is to place taller plants on the North side of your straw bale garden.
Condition

How Long Does It Take?
The bales must be conditioned to jumpstart the decomposition process of the straw. From start to finish, this process will take two weeks. Then, by the time you plant in them, they will be in a process of decomposition, breaking down around your plants and providing them with the nutrients they need to thrive.
Once the interior of the bale begins to decompose, you’re ready for planting. If you plant directly without conditioning, the plants won’t be able to access nutrients from the straw as readily. Without help, the breakdown process takes a while.
How do you condition a straw bale?
Soak them with water using the sprayer attachment on a hose over the first three days. Apply water-soluble nitrogen-rich fertilizer over five days (days four to nine). Urea fertilizers are the most commonly available. An organic alternative would be a blood meal. As blood meal is not water-soluble, it will take longer to break down.
The amount of fertilizer you apply will depend on which fertilizer you use. For example, if you’re using a 12-0-0 blood meal, you will need approximately 5 pounds per straw bale.
During the decomposition process, the temperature of the bales will rise above 120 degrees Fahrenheit (this is how you know it’s working!) This process is similar to the heat released by a hot compost pile as it breaks down.
Monitor the temperature by inserting a meat thermometer into the side of each bale. During days 10-14, ensure it stays moist but not soaked. The bales are conditioned when the temperature falls below 100 degrees Fahrenheit.
Add a Balanced Fertilizer

After the conditioning requirements are met, and you’ve chosen a location for your garden, move on to the next step of adding a balanced fertilizer. Since the straw is essentially a blank slate regarding nutrients, you’ll have to add everything the plant will need to thrive.
You’ve already added nitrogen during the conditioning process to kickstart that heating and decomposition, so the next step is to add a balanced fertilizer. Follow the instructions on the package and apply this balanced fertilizer just like you would use it to a soil-filled raised bed.
Consider the Plant Spacing
When choosing plants, you’ll want to consider the plant spacing. Since the bales are long and narrow, some plant choices will be better than others.
Plants that sprawl or grow outwards may not be good choices and may crowd each other out. Sturdy, upright plants that don’t require much support are great options.
Add Compost and/or Potting Mix

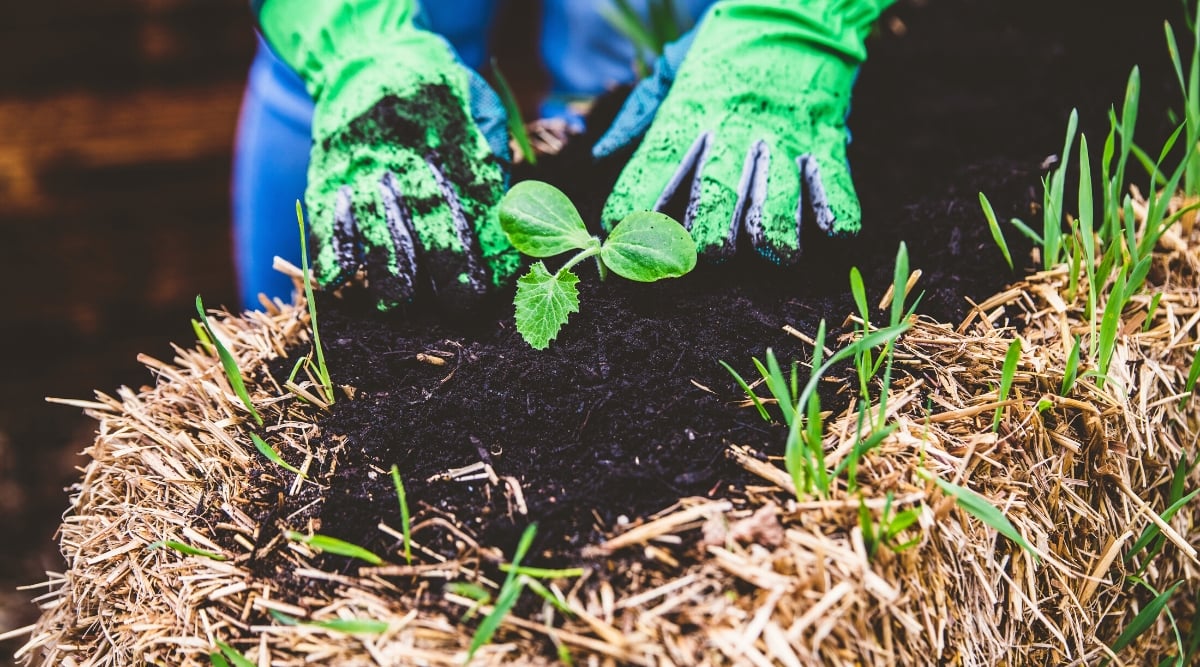
Even though the straw will serve as the main medium for your plants, you will still need to add some compost and/or potting mix to each bale to give the roots something to hold onto while they adjust to their new straw environment.
Pull apart the straw, make a hole slightly bigger than the pot your transplant is currently in, and then press compost and/or potting mix into the sides of the straw. Then, place your transplant into the hole just like you would in a hole in the ground or a raised bed.
Choose Your Plants Wisely

You can grow nearly anything in a straw bale garden, although sprawling plants like melons, pumpkins, and cucumbers are trickier to contain. Root vegetables like carrots, beets, and radishes are possible but also trickier than growing them directly in the soil. Tomatoes, peppers, eggplants, zucchini, potatoes, and spring greens are a great place.
Water Well While Plants Get Established

While straw bales are great at holding onto moisture in the middle, the tops will still dry out during drought or extreme heat, just like a raised bed. While your plants adjust to growing in a new medium, you’ll want to keep them well-watered while they get established.
This is especially important if hot or dry weather is on the horizon. Eventually, the plant’s roots will grow down into the center of the bale, where they will be able to access more moisture, but in the beginning, when the roots are near the surface of the bale. Be sure to keep it watered.
Treat Them Like A Raised Bed
At the end of the day, once you get your straw bale conditioned, fertilized, and planted out, it’s very similar to growing in a raised bed. The differences lie in the setup and eventual breakdown of the bales vs. filling a raised bed with soil.
Placing a bale is less physical labor than is required to fill a bed with soil. You’ll also want to water your bales like watering a raised bed. Check regularly to monitor the moisture by sticking your finger into the bale and water as needed.
Don’t Let That Straw Go To Waste!
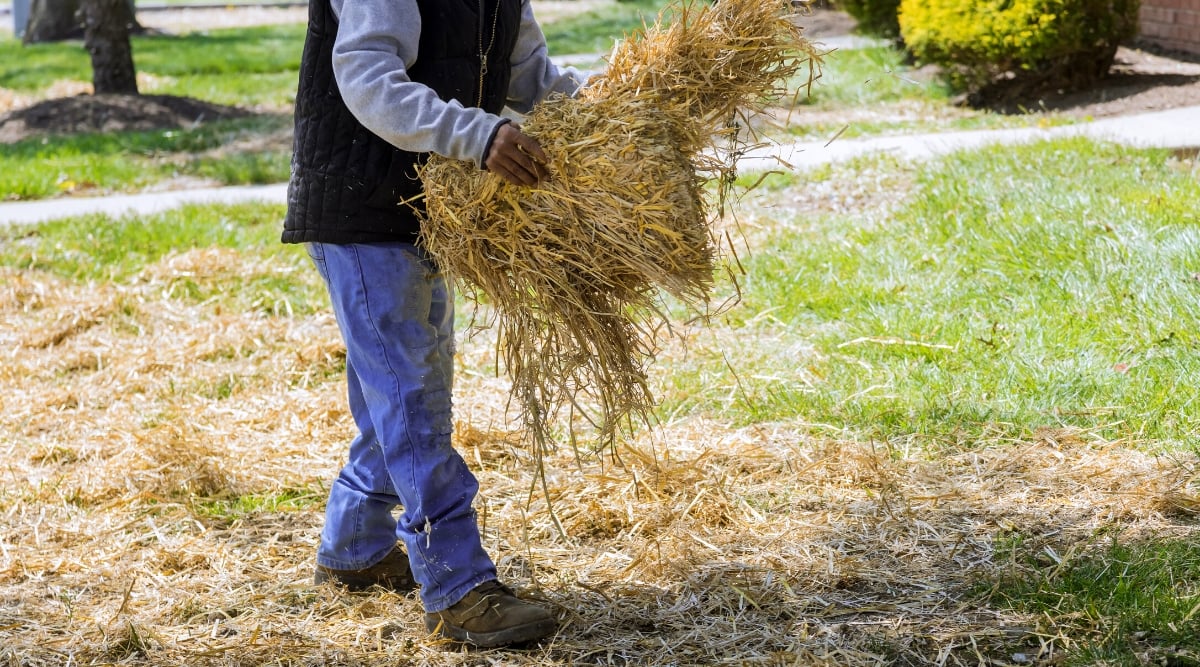
After the bales have broken down past the point of being usable as a planting medium, don’t throw them out just yet! Since you’ve spent a lot of time fertilizing and encouraging the breakdown of the straw, you have on your hands a very nutrient-rich mulch that you can spread around the rest of your garden. Or add it to a compost pile and let it break down into beautiful soil to circulate throughout your garden.
Final Thoughts
Straw bales provide a quick and easy way to set up a garden with a small investment of time and money. That being said, don’t be afraid to experiment! While there are ideal conditions and plants for using this method, you can also find creative ways to make things work. Straw bales are forgiving.
This is a great option for gardeners who may only have a temporary growing space or don’t want to invest in raised beds immediately. The bales allow for flexibility when determining placement for the garden (it can be moved at any point!). They’re low-cost, or no-cost, if you can find some old ones up for grabs at a local farm. It might be one of the more unconventional growing methods, but it has benefits.


