How to Grow a Kitchen Garden in Raised Beds
Would you like to grow your own food but don't have the time to be a full-time farmer? Large, comprehensive vegetable gardens are wonderful, but they take a lot of time and energy. A kitchen garden is a happy medium that will put fresh veggies on the table. But it won't break your back or take up your entire yard. In this article, gardening expert Melissa Strauss tells you how to grow a convenient kitchen garden in raised beds.


Contents
In France, it’s called a potager. In Scotland, a kailyaird. Here, we call this useful little space a kitchen garden. A kitchen garden is a compact and easily accessible space to grow plants for food, medicine, or other household use. This type of garden is an alternative to large-scale vegetable gardens that require an excess of time and maintenance. Growing a kitchen garden in raised beds is a great way to make this type of space even more accessible.
Kitchen gardens are certainly not a new phenomenon in the United States. In New England, in the 1600s, English colonists grew small kitchen gardens. These gardens typically consisted of raised beds placed close to the house, near the kitchen. By the mid-1800s, this type of garden became less popular. As populations grew and food became more easily accessible, kitchen gardens were not as necessary.
Home food gardens saw a resurgence during the Great Depression and then died down again until around the 1990s. The 2000s have seen a steady rise in gardening for food, and more recently, the traditional kitchen garden is coming back into vogue. If growing your own food is appealing, but you’re not sure where to start or don’t have much space, a raised bed kitchen garden is a great idea.
There are many advantages to raised bed gardening. It’s easier to control the health of your soil, including drainage and moisture retention. Weeding a raised bed garden is much less labor-intensive as well. Let’s talk about how to build a raised bed kitchen garden for fresh garden to table food.
Select Your Beds
The first step in creating any kind of raised bed garden is to choose the right beds for your purpose. There are few different options to choose from, and each has pros and cons depending on your needs. The main considerations to make when deciding what type of beds to use are permanence, durability, and expense. Let’s break it down!
Wood

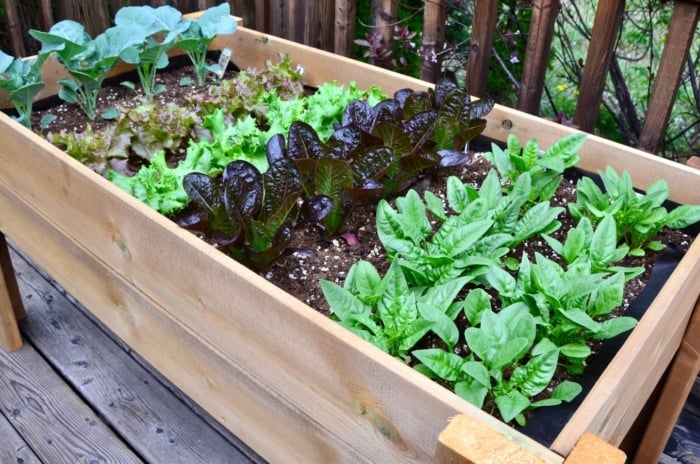
Wood beds are, generally speaking, the most economical choice for raised beds. There is a wide range of different quality products in this category. This influences the benefits and drawbacks of this material. Overall, if you are going for a natural look in your garden, wood beds are attractive and organic.
In my experience, low-cost wooden beds are the least durable type of raised bed. I’ve gotten one or two years out of this type of bed before they begin coming apart at the seams. That said, if you are a renter and only intend for this bed to last a year or two, they are an economical option. There is little hope of taking these with you when you move, as they are likely to fall apart in the process.
Conversely, well-made cedar beds can last a long time, and look beautiful and natural in the landscape. Cedar weathers very well, helps to repel insects, and is rot-resistant. If you like the natural look of wood beds, I would recommend going with high-quality beds. If you plan to keep this kitchen garden producing for many years, cedar beds will make it much easier to maintain.
A Note on Pressure-Treated Wood: Under no circumstances should you use pressure-treated wood to build beds for growing food. The chemicals used to preserve these products are toxic and can leach into your soil and food.
Metal

If you prefer a more industrial appearance, metal beds are a great investment. Metal beds are very durable and long-lasting. I switched all of my back-yard raised beds to metal two years ago, and I have no regrets. Metal beds are lightweight and easy to assemble. You can expect to get ten years or more out of your metal beds.
I am a small woman who likes to get things done on my own schedule. It’s important to me that I be able to assemble my own beds. While it would certainly be convenient to have a second set of hands involved, assembling metal beds can certainly be a one-person task. Once assembled, metal beds are lightweight and easy to move around the garden.
In terms of appearance, I do like cedar beds in the front of the house. However, when it comes to maintenance and durability, metal beds are my preference. These beds come in different colors depending on how much you want them to blend in or stand out. Over the long term, they are a very good investment and will save money over their lifespan. They are also easy to move, so if you move, you can take them with you!
Concrete, Stone, or Brick

The final and most durable type of raised bed are those built from stone, brick, or concrete. These are also the most costly and labor-intensive to install and depending on the material, they may not be food safe. If you want to build lifetime- raised beds with food safe bricks, though, this is a great way to go. I love a kitchen garden that looks like it belongs with the home. Using more permanent materials to build your beds is a perfect way to achieve that appearance.
If you have access to the materials and the time and skills to build this type of bed, you won’t regret it. This garden will be a charming and enduring addition to your home. If not, there are great alternatives that require much less expense and physical exertion.
Choose a Good Location
After selecting your beds, it’s time to choose your location. The location of your kitchen garden will influence its usefulness, as well as its productiveness. Choosing the right location will make all the difference in how much your garden produces, and how much you use it.
Exposure

Sun exposure is the most important factor in determining the location of this type of garden. The type of plants that go into a kitchen garden are typically ones that need a lot of sunlight. You can certainly reserve a corner of the space for partial shade plants. Mostly, though, your garden should get direct sun exposure for six to eight hours per day.
Not only does sufficient sunlight cause your plants to produce more, but it also helps to ward off fungal diseases. Powdery mildew can be a real headache in the vegetable garden. For the best results, locate your beds in a spot where they will get lots of sunlight.
Proximity

Ideally, a kitchen garden should be as close to and accessible from the kitchen as possible. It’s lovely to be able to see this garden from a kitchen window. I find that being able to see what ingredients are available to me makes me a better cook.
This shouldn’t take precedence over sun exposure, however. No matter how nice your garden is and how well it fits into the landscape, without enough sun, it will fall flat.
Decide What Size and Make a Map

You have your location, and now you need to decide how much space you will need to grow what you want to grow. If you make your garden very small, you may find yourself overflowing into other spaces. This cuts down on the convenience of your garden. When in doubt, go a little bigger. It’s better to over-plant than under-plant.
Once you’ve decided how much real estate to give to your project, it’s a great idea to make a plan. The ability to visualize and execute a well-designed garden from memory is a valuable skill. I envy gardeners who have this skill, but for me, a map is very helpful. Even if your map is primitive and not to scale, it will be helpful.
Your plan can be a simple sketched layout or an elaborate planting map. Whatever works best for you, will give you the most functional space. Making a map will help to create a space that is not just more attractive, but more functional. It will help with symmetry and the flow of traffic in the space. Consider leaving a space for a fruit tree or two in your space.
Set up Your Beds
The long-term success of your raised bed kitchen garden has a lot to do with how you prepare the space and set up your beds. You want your beds to be stable and sturdy, and to stand up to the elements. You also likely want it to look nice and be highly functional.
Level the Ground

My husband doesn’t often have much to contribute to my favorite pastime. He can dig a hole about ten times faster than I can, though, and when it comes to structural integrity, he’s my go-to guy. Thankfully, he knows the value of a nice, level playing ground. To make sure that your beds sit firmly in place, it’s important to start with a level foundation.
You may elect to use pavers or gravel as a foundation for your garden. These look very nice and make a great base, but they’re not for everyone. Whatever you choose as a foundation, make sure the ground is nice and level. Your beds will last longer if they have support all around. Beds that rock on uneven ground will weather faster.
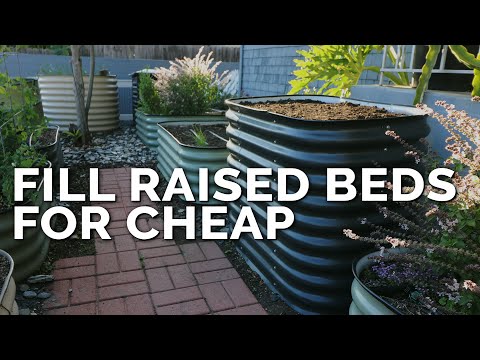
Bed Fillers

Depending upon the depth of your beds, you may need to add some other materials before you put down your soil. If you are dealing with tall beds, it would cost a fortune to fill them entirely with a high-quality soil mixture. You want these filler materials to be organic and break down over time, enriching the soil.
For very tall beds, consider laying logs or branches in the bottom. These take up space and break down into soil eventually. Leaf waste, wood chips, manure, grass clippings, and mulch are all good materials to fill that space. Just make sure to leave enough space for your soil. Your plants need soil deep enough to accommodate their roots.
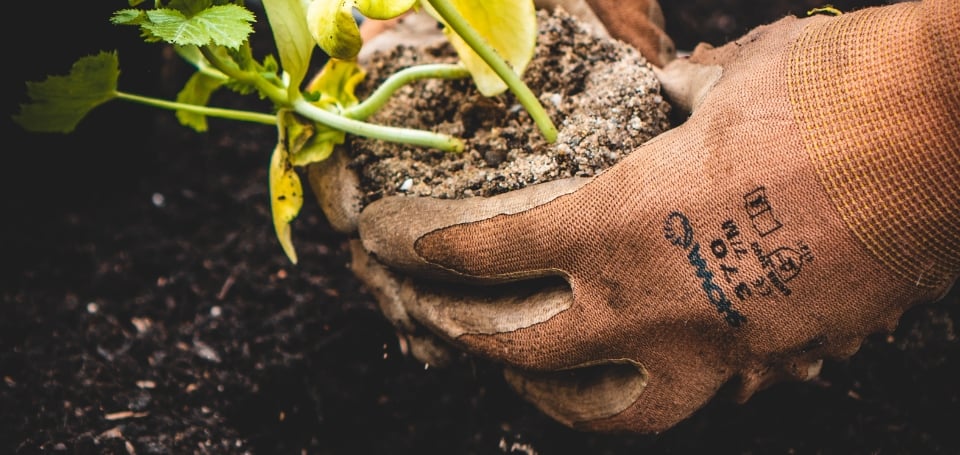
Soil

Now, about your soil. It is perfectly acceptable to go out and purchase raised bed potting mix or some other type of garden soil. You can certainly grow your fair share of vegetables in these. If you prefer to mix your own soil, you want to have a blend of different materials.
The first material should function to aerate and control the moisture and drainage of your mixture. Things like perlite, coarse sand, sphagnum moss, coconut coir, worm castings, and vermiculite are materials that achieve these goals. You want to have soil that retains some moisture in its particles but that drains thoroughly. Wet, dense soil is a short path to root rot.
Next, you want to choose materials that improve the fertility of your soil. This is what gives your plants a consistent supply of nutrients. A significant portion of your soil should fall into this category. Some materials that fall into this group include manure, compost, leaves, worm castings, and other organic fertilizers.
Irrigation

Finally, consider how you will irrigate your beds. A kitchen garden requires fairly consistent maintenance, and raised beds dry out, as all containers do. Basically, you’ll have to water this garden more than a conventional, in-ground vegetable garden. Sprinklers are a way to irrigate your garden without having to spend time every day with a hose. However, they waste a lot of water in evaporation. Overhead watering also contributes to fungal issues.
Better methods of irrigating this type of garden are through the use of soaker hoses or drip irrigation lines. These methods keep the water close to the soil. Most of the water absorbs directly into the soil, reaching the roots rather than evaporating. These methods conserve water and energy and do a better job of keeping the soil moist.
Think Vertically

When constructing your raised bed kitchen garden, don’t forget about plants that need something to climb. Plants like peas, vine tomatoes, cucumbers, and squash are all climbers. Consider building some vertical structures for these plants that will be sturdy and long-lasting.
You can connect beds with arches to create a really beautiful effect and close in your garden a bit. Just be aware of the sun exposure and how your arches will affect the amount of sun that reaches your beds. Trellises work as well. You can build trellises onto your beds or use more temporary structures.
Whatever type of structure you choose, these vertical elements serve both practical and ornamental purposes. You can use trellises and arbors to create walls for your garden. If you want to make this garden feel set apart from the rest of the yard, this is a wonderful way to do it.
Select Your Plants
Now, for the fun part! Choosing what to grow in your kitchen garden is simple. You should grow the plants that you use most in your personal kitchen. Seasonality is an important factor to bear in mind, as you won’t want to grow greens in the heat of summer. Freezing winters aren’t the best time to plant tomatoes, either. It’s a great idea to plan a year in advance to make sure that you plant the right things at the right time.
Herbs

For me, herbs are a must-have in the kitchen garden. Spring is the best time to plant your perennial herbs. Annual and biennial herbs can go in the bed any time from March through September, depending on your zone. Your zone will determine which herbs are perennial and which you will need to plant yearly. You can reference this chart to determine which herbs will work best in your garden.
| Herb | Perennial Zones | Annual Zones |
| Basil | 9-11 | 2-8 |
| Oregano | 5-11 | 2-4 |
| Rosemary | 7-9 | 2-6 |
| Mint | 3-8 | 9-10 (cool season) |
| Thyme | 5-9 | 2-4 (warm season) & 10-11 (cool season) |
| Cilantro | 7-12 | 2-6 |
| Sage | 4-10 | |
| Parsley | 7-9 | 3-6 |
| Dill | 9-11 | 2-8 |
| Tarragon | 4-11 | 2-3 |
| Marjoram | 9-10 | 2-8 |
| Chives | 3-9 |
Vegetables
Vegetables are the bulk of what you will plant in your kitchen garden. Nearly all of these plants are annuals, and you’ll need to plant them not only yearly but seasonally.
For the most part, warm-season vegetables will go in the ground right after your last expected frost date. Cool-season vegetables are a bit more complicated. Their planting will happen according to the season and climate, depending on their cold hardiness. Always check the back of your seed packets to find out when you should plant a particular vegetable.
Cool Season Vegetables

Cool-season vegetables are those that prefer cool weather for growth and production. These plants will usually die off in the heat of summer. In cold climates, these crops are best planted in late summer for harvesting in late fall and early winter. You can also plant these a couple of weeks before your last frost date in early spring for a late spring harvest. Many of them are frost-resistant.
In warm climates, these crops can go in the ground in early to late fall, and most will produce fruits during the winter months and into the spring. Warm climate areas have a longer growing season for cool weather crops. This is because these vegetables won’t die from freezing weather as they would in colder climates.
| Broccoli | Beets | Carrots |
| Chives | Lettuce | Cabbage |
| Chard | Onions | Radishes |
| Kale | Peas | Spinach |
| Leeks | Parsnips | Cauliflower |
| Asparagus | Turnips | Brussels Sprouts |
Warm Season Vegetables

Warm-weather vegetables are those that grow and produce in the summer. When you should plant these will depend on the last expected frost date and the soil temperature in your region. In most zones, these vegetables are planted in May and June. Warmer climates will see earlier planting.
Some of these vegetables are determinate. They will grow for a determined period of time and have a specific harvest period where all or most of your crop will ripen around the same time. Some vegetables are indeterminate, so they will continue to grow and produce until they die off in winter.
| Beans | Corn |
| Peppers | Cucumbers |
| Sweet Potatoes | Okra |
| Eggplants | Squash |
| Tomatoes | Pumpkins |
Fruits

A fruit tree or two is a beautiful addition to the kitchen garden. Your choice of trees should align with what grows best in your climate. Some trees, like mangoes and citrus, are almost exclusively warm-weather plants. When it comes to fruits like peaches, apples, pears, and many others, variety is the key. Some varieties are more heat tolerant, while others are extra cold-hardy.
Annual fruits like melons are warm-weather plants and should go into your beds in the spring. Think about planting a few perennial fruit bushes in your beds. Most varieties of blackberries and blueberries are appropriate as perennials in Zones 4-9. Grapes also grow well in a wide range of climates. Choose a variety that is happy in your zone for a stunning arch or trellis cover.
Edible Flowers

Another wonderful element to include in your kitchen garden is edible flowers. Whether you use them for teas or to decorate and bake with, edible flowers take culinary art to another level. They also really dress up the garden and contribute to a better harvest.
Many edible flowers are very attractive to pollinators. These plants draw beneficial insects to the garden. Here are some of my favorite edible flowers that will look beautiful in your raised bed kitchen garden:
| Nasturtium | Cornflower |
| Lavender | Geranium |
| Pansies | Sunflower |
| Calendula | Hibiscus (roselle) |
| Marigold | Amaranth |
| Rose | Borage |
Keep a Growing and Fertilizing Schedule

It’s always a good idea to keep a log or record of activity in your kitchen garden. There are lots of ways to do this, but I prefer a planner with space for weekly and monthly entries. Record information like the frequency of fertilizing in the garden. Write down when you plant your seeds and when they sprout. It’s a good idea to plan ahead and write reminders for when you should plant certain seeds.
Keeping a log of your garden actions will go a long way toward a functional garden. I find it too easy to miss out on planting certain things if I don’t plan ahead. This will help you to have an idea of when you should see ripe fruits and vegetables from your plants.
Rotate Your Crops

Crop rotation is an important factor in a successful kitchen garden. Rotating your crops helps keep your garden healthy in several ways. First, it cuts down on pest infestation. It also reduces the chance of diseases hiding out in your soil. Both of these benefits are twofold. Not only do they help keep pests and diseases away from your veggies, they also minimize the amount of chemicals you’ll need to use. Chemicals which can stay in your soil, causing harmful effects in the future.
Another benefit of crop rotation is that it will minimize the depletion of nutrients from the soil. Plants have specific nutrient needs. By continuously planting the same plants in one bed, the soil will become deficient in those most used nutrients. Rotating your crops will help to replenish your soil over time, cutting costs on fertilizers and other amendments.
To rotate your crops effectively, separate your beds into four zones. Plant each zone with a different family of plants each year. Don’t plant things from the same group in the same space two years in a row.
Common vegetable families are:
Solanaceae:
- Tomato
- Pepper
- Eggplant
- Potato
Apiaceae:
- Parsnip
- Carrot
- Celery
- Fennel
- Dill
- Parsley
Poaceae:
- Corn
- Lemongrass
- Barley
Chenopodiaceae:
- Chard
- Spinach
- Beet
Cucurbitaceae:
- Squash
- Cucumber
- Melon
- Pumpkin
Alliaceae:
- Leek
- Onion
- Garlic
- Chive
Cruciferae:
- Cabbage
- Broccoli
- Cauliflower
- Kale
- Kohlrabi
- Turnip
- Rutabaga
- Kale
- Brussels sprouts
Fabaceae:
- Beans
- Peas
An added bonus to plants in the Fabaceae family is that they are nitrogen-fixing. These are great crops to rotate in after soil has been depleted by other plants that take in a lot of nitrogen.
These plants help to affix the nitrogen in the soil, naturally, for plants that you will rotate in the following season. Leafy green vegetables tend to deplete your soil of nitrogen more severely than root vegetables or those that produce fruit.
Optional: Add a Greenhouse

Greenhouses are a major expense and can be a lot of work to build if you do it yourself. For these reasons, a greenhouse isn’t for everyone. That said, they can be very helpful for those living in cooler climates. A greenhouse enables you to start seeds earlier in the season before the soil is warm enough outside. You can also sustain some of your frost-tender plants in a greenhouse over the winter.
For gardeners in warm climates, a greenhouse is more of a luxury for the kitchen garden. It looks really nice and can serve several functions, but it’s not especially necessary. For those in cooler climates, a greenhouse is a worthwhile investment for any vegetable gardener.
Final Thoughts
Growing a kitchen garden in raised beds is a wonderful way to incorporate fresh fruits, vegetables, and herbs into your daily diet. Your garden can be as large or small as you have the time and resources for. There are no rules for what and how much you have to grow. With just a bit of your free time, a kitchen garden can be successful and productive.