How Often and How Long Should I Run Drip Irrigation?
Adding a drip irrigation system to your garden allows you to apply water to your plants’ roots easily. However, installing a drip irrigation system is just the first step. Join former vegetable farmer Briana Yablonski as she explains how often and how long to run drip irrigation.

Contents
While grabbing a garden hose to water a tray of seedlings or a single tomato plant is fine, I encourage people to consider installing a drip irrigation system in larger gardens. Drip tape applies water directly to the soil surface, limiting disease and slowing evaporation. When you put your drip irrigation on a timer, watering your entire garden is as easy as turning on the faucet and walking away.
However, installing an irrigation system is just the first step. After you’ve laid out your header and attached your drip tape, you must determine how often and how long you should run your irrigation system.
I’ll introduce you to the factors you should consider when answering this question and provide a rough irrigation schedule. You can use this guide to design the perfect irrigation schedule for your unique garden.
The Short Answer
Factors like plant type, soil type, temperature, rainfall, and water pressure impact how often and how long you should run drip irrigation. As a baseline drip irrigation schedule, you can run drip lines for 20-60 minutes one to three times per week in the summer and 10-30 minutes one to two times every week in the spring and fall. If your region experiences regular rainfall, the drip timing can be drastically reduced.
The Long Answer
From climate to soil to water pressure, there are many variables affecting crop irrigation needs. Unfortunately, I can’t provide a single answer to how often and how long you should run irrigation.
However, I can help you determine an appropriate drip irrigation schedule for your specific circumstances. By accounting for the following factors, you can provide the right amount of hydration to your plants.
What Is Drip Tape and Why Should You Use It?

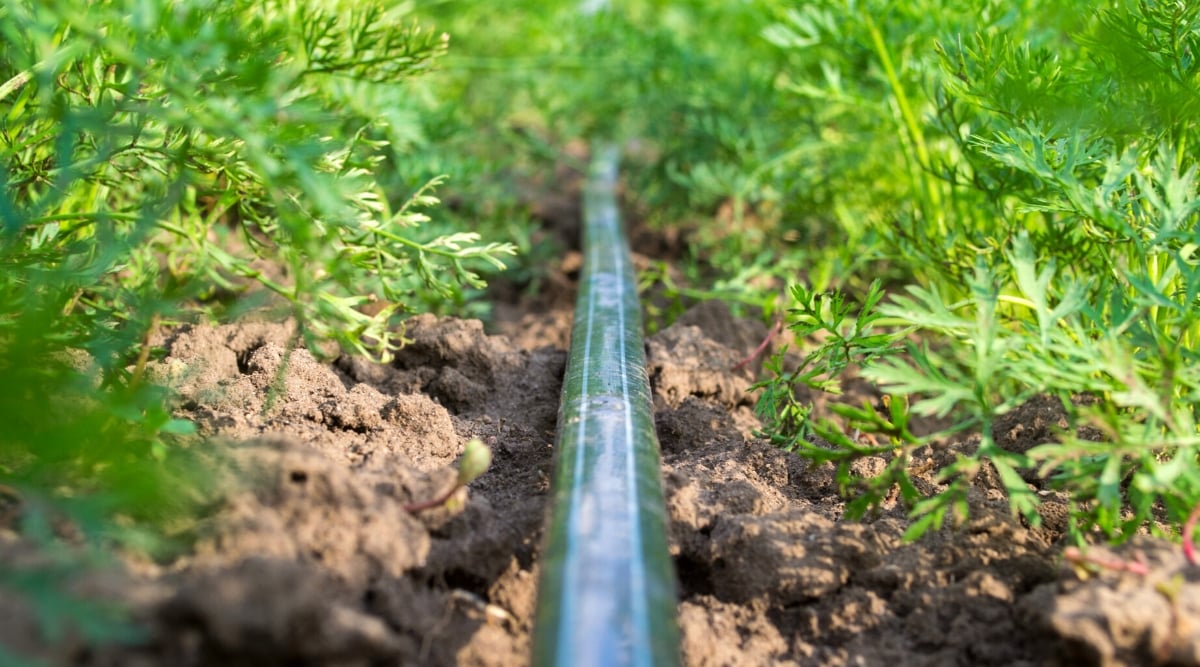
The irrigation line known as drip tape is flexible tubing that lies flat when empty. As water flows through, the tube becomes full and round. When the pressure inside it becomes high enough, water begins dripping out of small holes located along the length of the tape. The moisture percolates into the ground, where plant roots can absorb it.
If you ask me, drip tape is a must-have for any medium to large-sized garden. It allows you to precisely direct moisture to the base of your plants. Since it keeps the foliage dry, it prevents the development and spread of common garden diseases like powdery mildew. It also significantly conserves water.
Setting up a drip irrigation system takes a bit of work and money up front, but after it’s all set up, all you need to do is turn the faucet on and watch it flow. Depending on your interests, garden, and goals, you can buy a drip irrigation kit complete with all the necessary parts or design your own system.

Understanding How Water Flows Through Drip Tape
While all types of drip tape release water similarly, multiple factors impact just how much water a section sends into the ground. Before determining how often and how long to run drip irrigation, learn the factors that impact how much water the tape provides your plants. Understanding the following components can help you set up and run a drip irrigation system.
Drip Emitter Spacing

After you decide you want to install a drip irrigation system in your garden, one of your first steps is deciding which type of drip tape to purchase. While all types are the same width (5/8”) and operate similarly, you can find products with varying tape thickness and emitter spacing.
The thickness of the plastic used to make the tape impacts how long it will last. Thinner tape, like 5 mil tape, is less expensive and more susceptible to nicks, cuts, animal bites, and leaks. Therefore, it typically only lasts one season before you need to replace it.
Thicker drip tape, like 10 mil tape, is more expensive, holds up better, and lasts multiple seasons. The thickness of the tape doesn’t impact flow, but it’s an important factor to consider when purchasing.
However, the emitter spacing impacts the amount a piece of drip tape lets out, which can affect your drip irrigation schedule. Emitters are also nicknamed “drip holes.” This is where the water comes out. You can find options with holes spaced every 4 inches or as wide as 12 inches. More holes equals more water flowing out of the tape.
In general, tighter emitter spacing works well for densely planted crops and sandy soils, while wider emitter spacing suits clay soil and wider plant spacing. I use eight-inch emitter spacing for most of my garden.
Flow Rate

The flow rate determines how much water flows from a piece of drip tape. You can choose between low, medium, and high flow options for each emitter spacing.
Let’s say you want eight-inch emitter spacing to water head lettuce. If you choose a low-flow option and the pressure is eight PSI, 20 gallons will flow out 100 feet over the course of an hour. On the other hand, a high-flow option provides 40 gallons of water under the same conditions.
Low-flow tape allows you to run multiple lines simultaneously at low pressure, so it’s a good option if you have a large garden or low water pressure. Of course, you’ll need to leave the irrigation on for a longer period of time than you would if you were using a high-flow tape. A lower-flow tape may require a more frequent drip irrigation schedule.
Water Pressure

Drip irrigation works best at water pressures between 10-25 PSI. High pressure can rupture the lines or cause fittings to come loose, and low pressure can lead to slow or inconsistent flow.
Rather than relying on luck or the human eye to measure water pressure, install a pressure gauge at the header of your drip irrigation system to obtain an accurate reading. If you find the pressure is too high, install a pressure reducer at the faucet.
Factors Impacting Drip Irrigation Schedules
While I wish there was one perfect drip irrigation schedule for all gardens, this isn’t the case. That’s because multiple factors impact how often and how long you should run drip irrigation. Before you create a schedule, consider the following factors.
Soil Type

Imagine three identical cylindrical containers: one filled with basketballs, one with baseballs, and the other with marbles. If you pour the same amount of water into each container, it will hit the bottom of the basketball container first, then the bottom of the baseball container, and finally, the marble container. If you replace the basketballs with sand, baseballs with silt, and marbles with clay, you’ll better understand how water moves through different soil types.
The soil type also impacts how moisture spreads throughout the soil. In sandy soils, water from drip lines flows almost straight down. It may spread out a few inches around from the emitter, but that’s it. However, water will travel more horizontally in silt and clay soil. My garden soil is heavy in clay, so water spreads out more than six inches from each emitter.
Along with the amount of sand, silt, and clay in the soil, the percentage of organic matter also impacts how often you’ll need to run irrigation. Depending on the base soil type, organic matter can either increase or decrease the amount of moisture required. Adding organic matter like compost to the sandy soil increases the water-holding capacity and decreases the irrigation frequency needed. However, adding compost to soil high in clay improves drainage and leads to a greater need for water.
Rainfall

While it probably sounds obvious, you don’t need to turn on the irrigation if your soil is already wet. The more rain you receive, the less you’ll need to water. That means you should alter your irrigation schedule depending on rainfall.
Temperature, Humidity, and Wind

The temperature, humidity, and wind impact how plants use water and how quickly water evaporates from the soil. High temperatures, low humidity, and high winds cause plants to lose moisture from their leaves via evapotranspiration. Therefore, they need to take up more water to properly cool themselves and complete other processes.
High temperatures and winds also increase the speed at which water evaporates from the soil. Therefore, you’ll need to irrigate more often during hot, windy summer months than you will during cool, still winter months.
Plant Type
When you think about the varied climates plants grow in, it makes sense some plants require more hydration than others. Plants native to arid climates tolerate drought, so they’ll survive if you forget about them for a week or two. However, plants native to moist woods struggle if they don’t receive regular moisture.
A plant’s root system also impacts the ideal drip irrigation schedule. For example, plants like carrots and parsnips have long, thin roots that allow them to access water deep in the ground. However, they can’t reach water more than a few inches away. That means they’ll be okay if you run irrigation for a long time, just once a week. However, you need to place the drip lines just at the base of the plants and choose close emitter spacing.
On the other hand, plants like lettuce and bok choy have relatively shallow root systems. Since they can’t reach water held deep in the ground, you have to hydrate them more often. However, they can reach water a few inches away from their bases.
Plant Size

If you think you can water all tomatoes and zinnias the same, think again. Plant size also greatly affects how often and how much you should irrigate.
While larger plants require more water than smaller plants, they benefit from deep, infrequent irrigation. This encourages the plants to develop extensive root systems that can reach water and nutrients buried deep in the ground. Therefore, consider watering mature plants by running drip irrigation once or twice a week for one hour.
Smaller plants don’t require as much water as their larger counterparts, but their tiny roots mean they can only reach water within a few inches from the base of the plant. Therefore, you’ll need to water smaller plants more often but for a shorter period of time. If you water a mature tomato plant once a week for an hour, water a foot-tall seedling for 15 minutes three times a week.
Number of Drip Lines

Adding more drip lines to your garden will increase the amount that flows out during a set period of time. As long as the water pressure is high enough to fully pressurize all drip lines, two lines of drip tape provide double the volume as one line. Therefore, you can add multiple drip lines to particularly thirsty plants.
An Example of How Often and How Long to Run Drip Irrigation

After reading about all the factors I mentioned above, you know different gardens require different drip irrigation schedules. However, I’ll provide you with a general guide for how often and how long to run drip irrigation.
If you’re using medium flow tape with eight-inch emitter spacing, it will take 5.1 hours to apply one inch of water if the water pressure is 8 PSI. Since tomato plants require one to two inches per week, you’ll need to let the drip irrigation run for five to ten hours. I recommend splitting this water up into two watering events for mature plants and four events for seedlings.
However, if you’re using high-flow drip tape with four-inch spacing, it will take 1.9 hours to apply one inch of water. Therefore, you’ll only need to run your drip for two to four hours per week. Water mature plants once a week for three hours and seedlings three times a week for 45 minutes.
Keep an Eye Out for Overwatered and Underwatered Plants

Once you set your irrigation schedule, remember you can change it! If you notice your plants look thirsty in between irrigation sessions, provide a larger volume of water or water more frequently. And if your plants look overwatered, decrease the amount.
Since overwatered and underwatered plants both show symptoms like stunted growth and wilted and yellowing leaves, take a look at the soil. Wet soil likely indicates overwatering, while dry soil points to a lack of moisture.
Final Thoughts
Remember that many factors impact how long and how often you should run drip irrigation! By taking these aspects into account, you can create a suitable watering schedule. Keep an eye on your plants, adjust this schedule as necessary, and get ready to enjoy low-maintenance irrigation.


