How to Plant, Grow, and Care for Artichokes
Looking for unique vegetables, and have a lot of space? Consider growing artichokes! Gardening expert Rachel Garcia reveals all you'll need to grow them.


Contents
We don’t give artichokes enough credit. They may descend from thistles and have a funny name, but these are actually very interesting veggies!
Taste-wise, artichokes are delicious, especially dipped in melted butter. They have a nutty flavor and are surprisingly meaty in texture. Historically, the close relatives of artichoke plants were used medicinally. Today, we enjoy this unconventional veggie on pizza, in soups, or all on their own.
Let’s take a look at the wonderfully weird features of this plant and you’ll soon be imagining it in your own garden.
Plant Overview
- Plant Type Herbaceous perennial
- Family Asteraceae
- Genus Cynara
- Species Cynara cardunculus
- Native Area Mediterranean, North Africa
- Exposure Full sun
- Height 5’
- Watering Requirements Regular
- Pests & Diseases Aphids, armyworms, artichoke plume moth, snails, damping off, root rot, bract rot, powdery mildew
- Maintenance Low
- Soil Type Well-draining, nutrient-rich
- Hardiness Zone 7-10
What is an Artichoke?
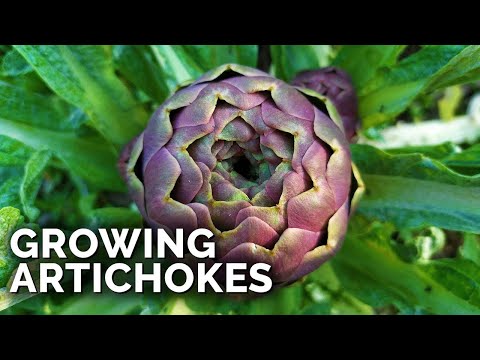
Artichokes are actually unopened flower buds. They have pointed leaves, called bracts, that wrap around the artichoke heart and developing flower. Depending on variety, the bracts are usually blue-green and dark purple. If left to blossom, the bracts open up to reveal fluffy, thistle-like flowers in bright blue-violet.
So how do artichokes grow? The plant itself is fairly large. It can reach five feet tall and two to four feet wide. It grows clumps of stalks adorned with jagged leaves and, in some varieties, spines or thorns.
Grow artichokes as part of decorative landscaping. They add a whimsical look that you just can’t get with run-of-the-mill garden flowers.
The globe artichokes that we’ll be focusing on are a subgroup of Cynara cardunculus, known as cardoon, which is an edible, clumpy weed that’s sometimes grown as decorative plants.
Artichoke falls under the Scolymus group of this species, which is less weed-like and commercially cultivated. If left to their own devices, these plants can revert to their wild and weedy roots.
Native Area
Artichokes originated in the Mediterranean and date back to at least the 5th century BC. They didn’t make their way to the US until the 1800s but became a big hit.
Today, over three-quarters of commercial artichokes come from California, mainly in Monterey County. There’s even an artichoke festival in Castroville every May celebrating this fantastic produce.
Because they’re from the Mediterranean, artichoke plants prefer mild winters and cool, long summers. The ideal artichoke growing zone is 7-10, though many gardeners in zones 5 and 6 have success as well.
It’s possible to grow artichokes as annuals in colder zones, but they don’t produce optimally until their second year of life.
Varieties
You have lots of artichoke varieties to choose from with varying sizes, shapes, and tastes. In terms of general care though, they all can be treated the same. These types are broken into two categories: globe and elongated.
Globe artichokes are round and heavy with tightly packed bracts. You’re probably the most familiar with the ‘Green Globe’, which is the type commonly sold in grocery stores. It has wide, green leaves and a great-tasting heart that’s fantastic in a number of dishes.
The top choice for home growing is the ‘Imperial Star’. It’s similar to the ‘Green Globe’, but with thinner leaves and a sweeter taste. A third globe type we love is the ‘Big Heart’, which is just what it sounds like. These are dense and heavy, often weighing a pound or more.
Elongated artichokes are, well, elongated. They’re somewhat cone-shaped until the bract open, making them a bit rounder. These types are often used as side dishes when they’re not stealing the show in your landscaping.
The ‘Violetta’ is an elongated artichoke plant that lives up to its name. This five-inch-long beauty has purple leaves that are tinged with green. ‘Siena’ artichokes, on the other hand, stray from tradition with wine-red coloring and a smaller size.
Planting
Plant artichokes in early spring or late fall (if you live in zones 9-11). Whatever you choose, the soil temperature needs to be 50-85°F to get these plants started right.
Artichokes grow well in containers, an excellent solution for those in cold zones. You can also start the seeds indoors in mid-winter and then transplant them in the spring.
Before planting, add some compost to your soil. Plant artichoke seeds half an inch deep and thin to six feet apart. Space transplants three to four feet apart. After planting, add some mulch to lock in moisture and regulate temperature.
How to Grow
As long as you follow these simple guidelines, your artichokes should be happy in your garden. You can expect a laid-back yet exciting growing season with these plants.
Light
Since it doesn’t tolerate shade well, give your artichoke plant full sun. However, if you live in an area with consistently hot temperatures, move it to a place with partial shade.
Aim for a spot with at least six hours of sunlight per day, or four hours minimum in warmer climates.
Water
Your growing artichoke plant is going to need a lot of water. The soil needs to be consistently moist, so water deeply and often. You’ll likely be watering at least one to three times a week.
If you’re having a hard time keeping the soil moist, try using soaker hoses at the base of the plant. Apply a layer of mulch too, as this will reduce evaporation of the water you’re applying.
Soil
You can plant in a variety of soil types, as long as they are well-draining. Artichokes need a lot of water but they don’t need to be drowned. The soil should also have a good amount of nutrients available, so I recommend adding compost just before planting and side-dressing as needed.
Artichoke plants thrive with a soil pH of 6.0 – 7.0. However, they’ve been known to tolerate alkaline soils well, so you shouldn’t have to worry too much about this.
Temperature
Ideally, the average temperature for this plant should be 50-75°F. Artichokes aren’t frost-hardy, so they should be planted no sooner than the last frost in cold areas. Artichokes also prefer a moderate amount of humidity, but adapt to different environments well.
Fertilizing
At the time of transplanting, feed your artichokes with a balanced, granular fertilizer. Vegetable fertilizer is an excellent choice for giving these plants the nutrients they need.
Throughout the growing season, apply liquid fertilizer to the soil as much as every other week if needed. A diluted liquid fish emulsion can provide a great kick of nitrogen for foliage growth early in the season. Later, switch to a higher phosphorus fertilizer for healthy artichoke development.
Maintenance
If you plan on overwintering your artichoke plants, trim them back after harvesting. The best process for this is to do what’s called ‘stumping’. Trim back bare canes at the soil level using a sterile garden knife or sharp pruning shears.
This also reduces the chances of overwintering pests in your plants. Remove your plant debris from the growing area, as it may contain some pest larvae.
Artichokes are not frost-hardy, so the base of the plant will need protection from the cold. Apply a thick layer of mulch at the plant’s base. Cold frames are also extremely effective.
Once the weather begins to warm again, be sure to pull back the mulch so the plant will feel the warmth and begin new growth. You can remove the cold frame once the danger of frost has passed.
Propagation
Three to five years after planting, the plant will have grown so much that it’ll produce smaller heads and may even die back. At this point, you need to divide the plant in order to keep the artichokes coming.
About two weeks before the last frost of spring, cut the plant into two or more pieces with three to four stalks each. You can either dig it up and cut between the roots individually or slice through them in-ground with a spade. Replant each division in its own spot and continue their care as normal (but remember to add compost to the soil before planting).
You can propagate artichokes outside of that three to five-year time span by removing a shoot or two with a spade. This method is great for sharing your plants with friends and family.
Artichokes can also be grown by sowing seed. It will take a while to get any harvests: 150-180 days to reach maturity from sowing.
Harvesting
Unless your goal is artichoke flowers, be prepared to harvest the heads before they open up. With a mature plant, you usually have late spring and fall crops, as well as sporadic yields throughout the summer. Timing is key here, so pay special attention to the maturity of each artichoke.
Use size to determine when to harvest artichokes. For most varieties, the buds should be fist-sized. The bracts will be gaining color but still compact. As the artichoke plants mature, the bracts will become tough and inedible, so don’t put it off!
Using sharp pruning shears, cut the stem an inch or two below the bud. Most plants will provide five to six main heads as well as smaller offshoots.
When the growing season is over, remember to cut back the plants and prepare them for winter. If the temperature is going to be consistently cold, mulch the base and then cover the plants with a large basket or woven plant bag. A cold frame can also help protect the plants.
Storage
Fresh artichokes will last for three to five days in the refrigerator. You can cook them by boiling, grilling, or roasting in the oven. To eat artichokes, pull off each leaf and scrape off the flesh with your teeth. Eat the heart and the inner stem whole. Discard the inner choke, which is the fine hair-like part inside the very center of the flower.
The safest method for long-term storage is to blanch and freeze the artichokes. Don’t freeze them uncooked, as they will turn into mush as they thaw. Instead, blanch them to cook them to just under-done, or an al dente state. You can then dry them off and place them on a tray in the freezer until they’re solid, then bag them for long-term storage.
While there are many recipes for pickled artichoke hearts or even whole baby artichokes, please don’t try to can these lovely veggies. There are no approved and safe recipes available for canning artichokes in the home kitchen. There are many recipes for pickling them, but they aren’t meant for long-term storage. Instead, they’re meant to be eaten once the pickling process has finished!
Common Problems
Most problems you may face while growing artichokes can be prevented by keeping the plants clean. Here are some common problems that can arise from too much moisture and too much debris.
Under and Overwatering
Underwatering will usually result in small, stunted buds with darkened bracts. Overwatering, on the other hand, can cause the roots to rot and invite disease. Prevent both of these problems by using well-draining soil and making sure you’re watering enough (especially in high heat).
Lack of Flowers
If your artichoke plants aren’t budding, there could be a number of causes. First, it’s very common for these plants not to flower until their second year of growth. Second, artichokes need plenty of water and soil nutrients. Last, if your plant has lots of leafy growth but no buds, you may be able to encourage flowering by cutting back some of the stalks.
Pests
A variety of pests may attack your artichoke plants. Be on the lookout for the more common problematic pests in this list.
Worms
A trio of caterpillar larvae are common on your plants. Army worms, artichoke plume moth larvae, and cabbage loopers all will happily snack on your foliage, leaving gaping holes or in some cases nothing at all behind. Bacillus thuringiensis, also referred to as BT, is an effective organic control for these pests.
Snails and Slugs
Snails and slugs like to hide out under foliage and debris when they’re not chewing holes through your plants. Use an organic slug and snail bait to prevent these from devouring your plants. You can also set traps, such as a shallow pan of beer, which both attracts and drowns the snails and slugs.
Sucking Insects
Aphids just can’t leave us alone, can they? They’ll suck the juice from the underside of leaves, eventually causing the plant to yellow and wilt. The easiest way to get rid of them is to spray them with a firm blast of water to knock them off your plants. Control large infestations with insecticidal soap or pyrethrin. Prevent artichoke aphids with diatomaceous earth or neem oil.
The sweet potato whitefly and the two-spotted spider mite are both sucking pests that can wreak some havoc. Their larvae will also infest the plant and cause damage. For both of these, neem oil is an excellent preventative as it kills off the pest eggs. If a large outbreak of either occurs, neem may help with that, but an organic pyrethrin spray is much more effective.
Leaf Miner
A particular type of leaf miner, the chrysanthemum leafminer, is an occasional pest of artichokes. Like all leaf miners, its larvae live inside the leaf and will chew long tunnels through it. Remove damaged leaves to try to eliminate the miners inside of them, and use organic spinosad spray to prevent further outbreaks.
Weevils
The cribrate weevil lays eggs at the base of your plants. As the eggs hatch, the larvae of this beetle move into the soil and chew on the root system there. Neem oil applied on all plant surfaces will smother the unhatched eggs and is a reasonable preventative. Pyrethrin will kill adults. For larvae in the soil, an application of beneficial nematodes will ensure they get killed off as well.
Beetles
Palestriped flea beetles are occasional leaf predators. These annoying little pests can be difficult to eradicate and will cause major damage to young plants. Older plants are somewhat tolerant of them, although they’ll still lose leaves to the flea beetle’s voracious appetite. Pyrethrin is effective at killing off large outbreaks.
An insect called the lygus bug likes to feed on young leaves, particularly on newly planted artichoke plants. This pest pierces the leaf and sucks the sap out. As it does so, it injects a toxin into the leaf that causes surrounding tissues to turn necrotic, leaving patchy brown parts that eventually fall out of the leaf.
Another, the proba bug, feeds similarly to the lygus bug and causes similar damage, but is most common in California.
Treatment of these two bugs is similar. Remove all weeds around the plants as these weeds may be the source from which the bugs originate. Monitor your plants to make sure that this sort of damage isn’t occurring. If it is, pyrethrin should eliminate the current attackers.
At the end of the season, cut bare stalks at their base and remove them from the field. This ‘stumping’ process eliminates any larvae that may still be on the plant and prevents them from overwintering there.
Diseases
Although artichokes are fairly easy to look after, they may come in contact with various diseases. Look out for any of the ones on the following list.
Root Rot
The pythium fungal pathogen causes damping off and root rot in artichoke plants. Seedlings may wilt and collapse, and the root and crown both can rot away. These conditions happen because of soggy soil conditions. Ensure your plants have plenty of drainage and that water doesn’t pool around them, and you shouldn’t experience these conditions.
Botrytis
Botrytis bract rot is another issue. It’s caused by Botrytis cinerea, and is often referred to as grey mold. While the grey mold can infect your leaves, it’s worst when it reaches our desired produce. The outside of the bract will turn brown, and on the inside, the grey mold caused by botrytis can be found.
Once botrytis gets into a bract, you’ll need to cut and dispose of that bract, as it’ll no longer be edible. Treatment of the plant with liquid copper fungicide will kill off the mold spores and prevent further spread.
Two different forms of powdery mildew, Leveillula taurica and Erysiphe cichoracearum, can affect the artichoke. Thankfully, both respond to standard treatments of neem oil. For a severe outbreak, the liquid copper fungicide mentioned above can clear up the mildew bloom.
Leaf Spot
A particular kind of leaf spot, ramularia leaf spot, strikes artichoke leaves. Caused by Ramularia cynarae, this creates circular brown lesions on both the top and bottom of leaves and on bracts. These brown lesions can also be the point at which the white fungal spores develop.
Treat this with a copper fungicide while it’s still on the leaves so it doesn’t reach the bracts. Trim off heavily diseased material so fungal spores can’t develop.
Crown Rot
Crown rot is a bacterial rot (Erwinia chrysanthemi) that can be disastrous to your plants. In early stages, it can cause stunted growth or leaf wilt. In more advanced stages, the plant can collapse completely.
The bacteria is believed to spread in two ways: through dividing diseased plants and replanting them, and through tools that are contaminated with the bacteria. Sterilize your tools between plants with a solution of one part bleach to ten parts water, and leave your tools in the solution for at least 20-30 seconds before rinsing it off.
Unfortunately, there’s no cure for bacterial crown rot. Your best bet would be to remove any diseased plants suffering from crown rot and destroy them. Do not compost the plant parts if it’s diseased.
Artichoke Curly Dwarf Virus
Artichoke curly dwarf virus is another tricky situation. Plants with this virus become severely stunted and can develop dark, necrotic patches on their leaves. The bracts produced by plants with this virus are deformed and inedible.
Interestingly, all plants infected with this virus are actually carrying a second virus as well, Artichoke latent virus, that produces no visible symptoms in the plant.
There’s no cure for artichoke curly dwarf virus. Plants that contract it should be removed and destroyed, not composted. It’s not believed to be soil-transmissible, but is known to be transmitted if a diseased plant is divided for propagation.
Frequently Asked Questions
Q: Do artichokes come back every year?
A: Yes, under the right conditions. These plants can overwinter in zones 5-11, but may need some protection from the elements. Many people in colder climates opt to plant them as annuals.
Q: How long does it take for an artichoke plant to produce?
A: You can expect a harvest 85-100 days after transplanting.
Q: How many artichokes does one plant produce?
A: Each plant typically grows five to six artichokes.
Q: Can artichokes be grown in pots?
A: Sure! As long as the container is large enough and filled with well-drained soil, the artichoke plants should thrive.
Final Thoughts
Have I convinced you to give artichokes a try? If not, let me add one last note: they’re low-maintenance! If you live in the right climate, you could easily grow your own artichoke plants and make them a fun addition to your garden.


